Firearms, Weapons, and Accessories: Difference between revisions
No edit summary |
|||
| (2 intermediate revisions by the same user not shown) | |||
| Line 11: | Line 11: | ||
{{ArmorBlackMarket}} | {{ArmorBlackMarket}} | ||
{{WeaponsVigilante}} | |||
{{WeaponsVigilanteRenown}} | {{WeaponsVigilanteRenown}} | ||
| Line 24: | Line 26: | ||
{{GearBlackwater}} | {{GearBlackwater}} | ||
{{WeaponsExplosive}} | |||
{ | |||
{ | |||
{{GearAttachments}} | |||
{ | |||
{{GearGeneral}} | |||
Latest revision as of 23:17, 29 March 2025
Caden
Gun Store Weapons
Accessible once the firearms license is purchased.
| Picture | Gun name | Price | Caliber | Magazine Capacity | Magazine Prices | DLC |
|---|---|---|---|---|---|---|
 |
Pm9 | $3,500 | 9x21mm | 10 | $250 | None |
 |
Rook-40 | $5,000 | 9x21mm | 16/30 | $350 | None |
 |
P07 | $5,000 | 9x21mm | 16/30 | $350 | None |
 |
ACP-C2 | $10,000 | .45 ACP | 9 | $500 | None |
| Zubr .45 | $10,000 | .45 ACP | 6 | $500 | None | |
 |
Starter Pistol | $5,000 | Signal Cylinder | 6 | $500 | Karts |
 |
PDW2000 | $10,000 | 9x21mm | 30 | $350 | None |
 |
Protector | $11,000 | 9x21mm | 30 | $350 | Apex DLC |
Workers' Protection Weapons
These weapons can be purchased at the gun store by those who have a WPL.
| Picture | Item | Price | Caliber | Magazine Capacity | Magazine Prices | DLC |
|---|---|---|---|---|---|---|
 |
4-Five .45 | $7,500 | .45 ACP | 11 | $500 | None |
 |
Vermin | $40,000 | .45 ACP | 30 | $500 | None |
 |
TRG-20 | $50,000 | 5.56x45mm NATO | 30 | $400 | None |
 |
MXC | $50,000 | 6.5x39mm NATO | 30 | $650 | None |
 |
SPAR-16 (Khaki) | $55,000 | 5.56x45mm NATO | 30 | $400 | Apex DLC |
 |
Katiba Carbine | $65,000 | 6.5x39mm Caseless | 30 | $650 | None |
Black Market Weapons
These weapons are available for purchase at a black market once your gang captures them.
All firearms in the gun store are also available at black markets.
| Picture | Item | Price | Caliber | Magazine Capacity | Magazine Prices | DLC |
|---|---|---|---|---|---|---|
 |
SDAR | $25,000 | 5.56x45mm NATO | 20 | $500 | None |
 |
Kozlice Sawed-Off | $45,000 | 12 Gauge Pellets | 2 | $500 | Contact |
|
Vermin | $40,000 | .45 ACP | 30 | $500 | None |
 |
Mk20C | $50,000 | 5.56x45mm NATO | 30 | $400 | None |
 |
TRG-21 | $50,000 | 5.56x45mm NATO | 30 | $400 | None |
 |
AKS-74U | $50,000 | 5.45x39mm | 30 | $500 | Apex |
 |
AKM | $60,000 | 7.62x39mm | 30/75 | $500/$15,000 | Apex |
 |
CAR-95 | $55,000 | 5.8x42mm | 30/100 | $500/$6,500 | Apex |
 |
CAR-95-1 | $75,000 | 5.8x42mm | 30/100 | $500/$6,500 | Apex |
 |
ADR-97 | $60,000 | 5.7x28mm | 50 | $500 | None |
Black Market Clothing Store - Vests
These vests are available for purchase at a black market once your gang captures them. All vests in the clothing store are also available at black markets.
Clothing that is restricted by Donation, Olympus+ or Gang is now shown in Orange but unpurchaseable.
| Picture | Name | Price | Armor Tier | Explosive Resistance | Virtual Item Capacity | DLC |
|---|---|---|---|---|---|---|
 |
Tactical Vests | $10,000 | I | Minimal | 13 | None |
 |
Raven Vest | $10,000 | I | Minimal | 18 | None |
 |
Deck Crew Vests | $20,000 | II | Moderate | 6 | Jets |
Vigilante Shop Weapons
Requires the vigilante license and the required tier.
| Picture | Item | Price | Caliber | Magazine Capacity | Magazine Prices | DLC | Tier |
|---|---|---|---|---|---|---|---|
 |
P07 | $10,000 | 9mm | 30 | $300 | None | I |
|
ACP-C2.45 | $10,000 | .45 | 9 | $500 | None | II |
 |
Sting 9mm | $25,000 | 9mm | 30 | $400 | None | II |
|
Vermin | $40,000 | .45 ACP | 30 | $500 | None | III |
 |
Spar-16 (Sand) 5.56mm | $100,000 | 5.56x45mm | 30 | $400 | Apex DLC | IV |
 |
Spar-16 GL | $125,000 | 5.56x45mm | 30 | $400 | Apex DLC | IV |
 |
Mk20 | $92,500 | 5.56x45mm | 30 | $400 | None | IV |
 |
Mk20 GL | $115,000 | 5.56x45mm | 30 | $400 | None | IV |
 |
Spar-16S | $125,000 | 5.56x45mm | 30 | $400 | Apex DLC | V |
Vigilante Renown Point Shop Weapons
Requires the vigilante license and the required tier.
| Picture | Item | Price | Caliber | Magazine Capacity | Magazine Prices | DLC | Tier |
|---|---|---|---|---|---|---|---|
|
CAR-95 | 40 RP | 5.8x42mm | 30 | 1 RP | Apex | IV |
 |
Promet | 40 RP | 6.5x39mm NATO | 30 | 1 RP | None | V |
 |
MX | 40 RP | 6.5x39mm NATO | 30 | 1 RP | None | V |
 |
MXGL | 40 RP | 6.5x39mm NATO | 30 | 1 RP | None | V |
 |
Promet MR | 50 RP | 6.5x39mm NATO | 30 | 1 RP | Contact | V |
 |
MXM | 50 RP | 6.5x39mm NATO | 30 | 1 RP | None | V |
 |
ADR-97 | 60 RP | 5.7 mm | 50 | 1 RP | None | V |
 |
MXSW | 70 RP | 6.5x39mm NATO | 30 | 1 RP | None | V |
 |
9mm Suppressor | 40 RP | 9mm | N/A | N/A | None | V |
 |
.45 Suppressor | 40 RP | .45 | N/A | N/A | None | V |
 |
5.56 Suppressor | 250 RP | 5.56 | N/A | N/A | None | VI |
Rebel Outpost Weapons
Requires the rebel training license. Weapons from the black market, WPL weapons, and gun store firearms are available at rebel outposts.
| Picture | Item | Price | Caliber | Magazine Capacity | Magazine Prices | DLC |
|---|---|---|---|---|---|---|
|
SDAR | $25,000 | 5.56x45mm NATO | 20 | $400 | None |
|
Vermin | $40,000 | .45 ACP | 30 | $500 | None |
|
Mk20C | $40,000 | 5.56x45mm NATO | 30 | $400 | None |
|
TRG-21 | $40,000 | 5.56x45mm NATO | 30 | $400 | None |
|
AKS-74U | $50,000 | 5.45x39mm | 30 | $500 | Apex |
|
CAR-95 (Black) | $55,000 | 5.8x42mm | 30/100 | $500/$15,000 | Apex |
|
CAR-95-1 | $75,000 | 5.8x42mm | 30/100 | $500/$15,000 | Apex |
|
ADR-97 | $70,000 | 5.7x28mm | 50 | $500 | None |
|
Kozlice Sawed-Off | $45,000 | 12 Gauge Pellets | 2 | $500 | None |
 |
MK20 | $45,000 | 5.56mmx45mm NATO | 30 | $400 | None |
|
Kozlice Sawed-Off | $45,000 | 12 Gauge Pellets | 2 | $500 | Contact |
 |
Kozlice | $55,000 | 12 Gauge Pellets | 2 | $500 | Contact |
|
AKM | $60,000 | 7.62x39mm | 30/75 | $500/$15,000 | Apex |
|
AKM (Flashlight) | $60,000 | 7.62x39mm | 30/75 | $500/$15,000 | Apex |
|
SPAR-16 | $70,000 | 5.56x45mm NATO | 30/150 | $400/$10,000 | Apex |
 |
SPAR-16S | $150,000 | 5.56x45mm | 30/150 | $400/$10,000 | Apex |
 |
Katiba | $65,000 | 6.5x39mm Caseless | 30 | $650 | None |
|
MXC | $50,000 | 6.5x39mm NATO | 30/100 | $650/$15,000 | None |
 |
MX | $60,000 | 6.5x39mm NATO | 30/100 | $650/$15,000 | None |
|
MXM | $70,000 | 6.5x39mm NATO | 30/100 | $650/$15,000 | None |
|
MX-SW | $150,000 | 6.5x39mm NATO | 30/100 | $500/$15,000 | None |
 |
Type 115 | $90,000 | 6.5x39mm/.50 BW | 30 | $650 | Apex |
|
Promet | $80,000 | 6.5x39mm NATO | 30 | $650 | Contact |
|
Promet MR | $90,000 | 6.5x39mm NATO | 30 | $650 | Contact |
 |
Rahim | $90,000 | 7.62x54mm | 10 | $500 | None |
 |
Mk18 ABR | $105,000 | 7.62x51mm NATO | 20 | $762 | None |
 |
Mk14 | $100,000 | 7.62x51mm NATO | 20 | $250/$762 | Marksmen |
 |
SPAR-17 | $102,500 | 7.62x51mm NATO | 20 | $762 | Apex |
 |
Mk-1 EMR | $137,500 | 7.62x51mm NATO | 20 | $762 | Marksmen |
 |
LIM-85 | $160,000 | 5.56x45mm NATO | 200 | $12,500 | Apex |
 |
Mk200 | $215,000 | 6.5x39mm Caseless | 200 | $15,000 | None |
 |
CMR-76 | $75,000 | 6.5x39mm | 30 | $500 | Apex |
 |
AKU-12 | $105,000 | 7.62x39mm | 30/75 | $500/$15,000 | Contact |
 |
AK-12 | $120,000 | 7.62x39mm | 30/75 | $500/$15,000 | Apex |
 |
RPK-12 | $160,000 | 7.62x39mm | 75 | $500/$15,000 | Contact |
 |
Titan MPRL | $400,000 | 127mm HE-Frag Missile | 1 | $150,000 | None |
Rebel Clothing Store - Vests
Clothing that is restricted by Donation, Olympus+ or Gang is now shown in Orange but unpurchaseable.
| Picture | Name | Price | Armor Tier | Explosive Resistance | Virtual Item Capacity | DLC |
|---|---|---|---|---|---|---|
 |
GA Carrier Lite | $30,000 // 2 WP | III | High | 15 | None |
 |
GA Carrier Rig | $40,000 // 3WP | III | High | 15 | None |
 |
GA Carrier GL Rig | $55,000 // 4 WP | III | Maximum | 18 | None |
 |
EOD Vest | $45,000 // 3WP | III | Maximum | 4 | Laws of War |
 |
Modular Carrier Vest | $30,000 // 2 WP | III | High | 8 | First Contact |
 |
Modular Carrier Lite | $30,000 // 2 WP | III | High | 16 | First Contact |
 |
Modular Carrier GL Rig | $55,000 // 4 WP | III | High | 16 | First Contact |
 |
Carrier Lite | $30,000 // 2 WP | III | High | 18 | None |
 |
CTRG Plate Carrier Rig Mk.1 | $30,000 // 2 WP | III | High | 18 | None |
 |
Carrier GL Rig | $55,000 // 4 WP | III | Maximum | 18 | None |
 |
Suicide Vest | $600,000 // 50 WP | 0 | No Armor | 3 | None |
War point Shop Weapons
Available at rebel outposts and bought with war points instead of money from your bank.
| Picture | Item | Price | Caliber | Magazine Capacity | Magazine Prices | DLC |
|---|---|---|---|---|---|---|
|
MX | 5 WPs | 6.5x39mm NATO | 30/100 | 1 WP/2 WP | None |
 |
MXM | 6 WPs | 6.5x39mm NATO | 30/100 | 1 WP/2 WP | None |
 |
MX-SW | 9 WPs | 6.5x39mm NATO | 30/100 | 1 WP/2 WP | None |
 |
ADR-97 TR | 7 WPs | 5.7x28mm | 50 | 1 WP | None |
 |
CMR-76 | 6 WPs | 6.5x39mm | 20 | 1 WP | Apex |
 |
SPAR-17 | 6 WPs | 7.62x51mm NATO | 20 | 1 WP | Apex |
 |
Mk18 ABR | 7 WPs | 7.62x51mm NATO | 20 | 1 WP | None |
 |
Mk-1 EMR | 9 WPs | 7.62x51mm NATO | 20 | 1 WP | Marksmen |
 |
ASP-1 Kir | 30 WPs | 12.7x54mm | 10 | 1 WP | Marksmen |
 |
Type 115 | 6 WPs | 6.5x39mm/.50 BW | 10/30 | 1 WP | Apex |
 |
Mk200 (Black) | 18 WPs | 6.5x39mm Caseless | 200 | 2 WP | None |
 |
AK-12 (Arid) | 7 WPs | 7.62x39mm | 30/75 | 1 WP/5 WP | Apex |
 |
AKU-12 (Arid) | 7 WPs | 7.62x39mm | 30/75 | 1 WP/5 WP | Apex |
 |
RPK-12 (Arid) | 15 WPs | 7.62x39mm | 30/75 | 1 WP/5 WP | Apex |
|
Promet | 5 WPs | 6.5x39mm NATO | 30 | 1 WP | Contact |
 |
Promet (Camo) | 5 WPs | 6.5x39mm NATO | 30 | 1 WP | Contact |
 |
Promet MR (Camo) | 6 WPs | 6.5x39mm NATO | 30 | 1 WP | Contact |
 |
Promet SG (Camo) | 23 WPs | 6.5x39mm NATO | 30 | 1 WP | Contact |
|
Kozlice 12G (Sawed-Off) | 4 WPs | 12 Gauge Pellets/Slugs | 2 | 1 WP/3 WP | Contact |
|
Kozlice 12G | 4 WPs | 12 Gauge Pellets/Slugs | 2 | 1 WP/3 WP | Contact |
 |
MAR-10 (Sand) | 320 WPs | .338 Lapua Magnum | 10 | 5 WP | Marksmen |
 |
Titan MPRL (Olive) | 30 WPs | 127mm HE-Frag Missile | 1 | 10 WP | None |
 |
RPG-7 | 125 WPs | PG-7V Heat Grenade | 1 | 20 WPs | Apex |
 |
M6 SLAM Mine | 10 WPs | N/A | N/A | N/A | None |
|
9mm Suppressor | 5 WPs | N/A | N/A | N/A | None |
|
.45 ACP Suppressor | 5 WPs | N/A | N/A | N/A | None |
|
5.56mm Suppressor | 30 WPs | N/A | N/A | N/A | None |
 |
5.7mm Suppressor | 30 WPs | N/A | N/A | N/A | None |
 |
5.8mm Stealth Suppressor | 35 WPs | N/A | N/A | N/A | Apex |
 |
6.5mm Suppressor | 50 WPs | N/A | N/A | N/A | None |
 |
6.5mm Stealth Suppressor | 50 WPs | N/A | N/A | N/A | Apex |
 |
5.56mm 150 Round Drum | 1 WPs | N/A | N/A | N/A | None |
 |
7.62mm 150 Round Box Tracer | 5 WPs | N/A | N/A | N/A | None |
 |
.338 LM 10 Round Magazine | 5 WPs | N/A | N/A | N/A | Marksmen |
 |
.50 BW 10 Round Caseless Magazine | 20 WPs | N/A | N/A | N/A | Apex |
 |
12 Gauge 2Rnd (Slugs) | 3 WPs | N/A | N/A | N/A | Contact |
 |
12 Gauge 6 Round (Slugs | 15 WPs | N/A | N/A | N/A | Contact |
 |
12 Gauge 6 Round (Pellets) | 2 WPs | N/A | N/A | N/A | Contact |
 |
Non-Tracer Zafhir Belt | 5 WPs | N/A | N/A | N/A | None |
 |
Explosive Charge | 12 WPs | N/A | N/A | N/A | None |
 |
RGO Hand Grenade | 4 WPs | N/A | N/A | N/A | None |
 |
RPG-42 AT Rockets | 25 WPs | N/A | N/A | N/A | None |
 |
RPG-42 HE Rockets | 25 WPs | N/A | N/A | N/A | None |
War point Clothing Shop
Available at rebel outposts and bought with war points instead of money from your bank.
Clothing that is restricted by Donation, Olympus+ or Gang is now shown in Orange but unpurchaseable.
Players cannot wear Granit/Tracksuits with Tier 4 or higher armor.
| Picture | Name | Price | Armor Tier | DLC |
|---|---|---|---|---|
 |
CSAT Fatigues | 5 WPs | II | None |
 |
CSAT Ghillie | 6 WPs | II | None |
 |
CSAT Full Ghillie | 7 WPs | II | Marksmen |
 |
Granit | 5 WPs | II | Contact |
 |
Pilot Coveralls | 4 WPs | II | None |
Blackwater Armory Gear
These weapons and items are available as rewards for completing the blackwater armory robbery.
Players can no longer wear Granit/Tracksuits or CSAT Fatigues/PCoveralls with Tier 4 or higher ARMOR.
| Picture | Item | Rarity | Caliber | Magazine Capacity | Magazine Prices | DLC |
|---|---|---|---|---|---|---|
|
ASP-1 Kir | Very Rare | 12.7x54mm | 10 | 1 WP | Marksmen |
 |
Zafir | Very Rare | 7.62x54mm | 150 | 5 WP | None |
|
Promet SG | Very Rare | 6.5x39mm NATO/12G Pellets/12G Slug | 30/6 | $500/2 WP/15 WP | Contact |
|
RPG-7 | Very Rare | PG-7V HEAT Grenade | 1 | 20 WP | Apex |
|
MAR-10 (Camo) | Rare | .338 Lapua Magnum | 10 | 5 WP | Marksmen |
 |
Titan MPRL | Rare | 127mm HE-Frag Missile | 1 | 10 WP | None |
 |
LIM-85 | Common | 5.56×45mm NATO | 200 | $12,500 | Apex |
 |
Mk200 | Common | 6.5x39mm Caseless | 200 | $15,000 | None |
 |
Pilot Helmet | Common | Armour Rating: III | N/A | N/A | None |
 |
Special Purpose Helmet | Ultra Rare | Armour Rating: V | N/A | N/A | Apex |
 |
CSAT Defender Helmet | Uncommon | Armour Rating: V | N/A | N/A | None |
 |
Carrier Special Rig | Common | Armour Rating: V | Explosive Resistance: Very High | Virtual Item Carry Space: 13 | None |
 |
CTRG Plate Carrier Rig Mk.2 | Common | Armour Rating: IV | Explosive Resistance: High | Virtual Item Carry Space: 18 | None |
 |
GA Carrier Lite | Common | Armour Rating: III | Explosive Resistance: High | Virtual Item Carry Space: 15 | None |
|
Suicide Vest | Common | N/A | N/A | N/A | None |
|
CSAT Full Ghillie | Uncommon | Armour Rating: II | N/A | N/A | Marksmen |
|
CSAT Ghillie | Uncommon | Armour Rating: II | N/A | N/A | None |
|
CSAT Fatigues | Common | Armour Rating: II | N/A | N/A | None |
 |
CSAT Pilot Coveralls | Uncommon | Armour Rating: II | N/A | N/A | None |
|
M6 SLAM Mine | Uncommon | N/A | N/A | N/A | None |
 |
APERS Tripwire Mine | Uncommon | N/A | N/A | N/A | None |
 |
Claymore Charge | Common | N/A | N/A | N/A | None |
 |
CTRG ENVG II (Grey) | Ultra Rare | N/A | N/A | N/A | Apex |
|
5.56mm Suppressor | Very Rare | N/A | N/A | N/A | None |
|
5.8mm Stealth Suppressor | Very Rare | N/A | N/A | N/A | Apex |
|
6.5mm Suppressor | Very Rare | N/A | N/A | N/A | None |
|
6.5mm Stealth Suppressor | Very Rare | N/A | N/A | N/A | Apex |
 |
7.62mm Suppressor | Ultra Rare | N/A | N/A | N/A | None |
 |
DMS LPVO 2x-4x | Ultra Rare | N/A | N/A | N/A | None |
|
.338 LM 10 Round Magazine | Rare | N/A | N/A | N/A | Marksmen |
 |
RPG-42 Alamut | Ultra Rare | TBG-42V HE Grenade/PG-42V | 1 | N/A | None |
 |
PG-42V Rocket | Ultra Rare | N/A | N/A | 25 WP | None |
 |
TBG-42V HE Rocket | Ultra Rare | N/A | N/A | 25 WP | None |
Explosive Items
-
Small Urban Explosive 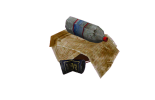
Price: $250,000 -
Large Urban Explosive 
Price: $350,000 -
M6 Slam Mine 
Price: $200,000 / 10 WP -
Explosive Charge 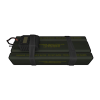
Price: $190,000 / 12 WP -
RGO Hand Grenade 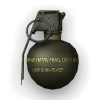
Price: $50,000 / 4 WP -
Explosive Satchel 
Price: $400,000 -
Deadman Switch 
Price: $100,000


The Deadman Switch is a virtual Y-item to be used in conjunction with the Suicide Vest. When the Suicide Vest is equipped you can use the Deadman Switch from your Y-inventory to "arm" it starting a 5 second interaction animation. Once armed, upon your death the suicide vest will detonate. However being in a downed state (tasers, vehicles, etc.) does not affect the triggering of the Deadman Switch. After activation, text will hover above the equipped player's head as well as blinking red lights on the vest to indicate to other players that the Deadman Switch is armed. APD may defuse the Deadman Switches with their bomb defuse kits.
Attachments
-
Flashlight 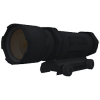
Price: $500 -
Pistol Flashlight 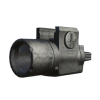
Price: $500 -
ACO 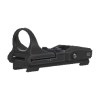
Price: $1,000 -
MK17 Holosight 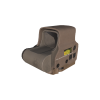
Price: $1,000 -
MK17 SMG Holosight 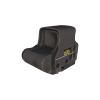
Price: $500 -
MRCO Scope 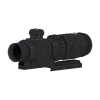
Price: $1,000 -
RCO Scope 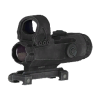
Price: $1,000 -
ARCO Scope 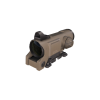
Price: $1,000 -
ARCO Scope 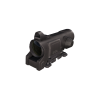
Price: $1,000 -
ARCO AK 
Price: $1,000 -
Promet Modular Sight 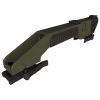
Price: $1,000 -
ERCO 
Price: $1,000 -
IR Laser Pointer 
Price: $1,000 -
Bipod 
Price: $12,500


Gear
-
Smoke Grenade (White) 
Price: $1,000 -
Smoke Grenade (Red) 
Price: $1,000 -
Smoke Grenade (Green) 
Price: $1,000 -
Smoke Grenade (Purple) 
Price: $1,000 -
First Aid Kit 
Price: $500 -
First Aid Kit + Price: $500 -
Tool Kit 
Price: $500 -
GPS 
Price: $50 -
Map 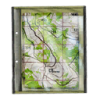
Price: $50 -
Compass 
Price: $50 -
Watch 
Price: $50 -
Binocular 
Price: $1,000 -
Rangefinder 
Price: $2,000 -
Night Vision 
Price: $1000 -
Fullscreen NVGs Price: $5000 -
Compact NVG (Green) 
Price: $1,000


