SWAT: Difference between revisions
| (22 intermediate revisions by 4 users not shown) | |||
| Line 12: | Line 12: | ||
Follow the list below to submit an application for SWAT. | Follow the list below to submit an application for SWAT. | ||
#Navigate to the [https://olympus-entertainment.com/ | #Navigate to the [https://olympus-entertainment.com/ Olympus Forums]. | ||
#Navigate to the "Support" area of the forums. | #Navigate to the "Support" area of the forums. | ||
#Select "New Request" | #Select "New Request" | ||
#Select " | #Select "SWAT Application" from the department drop-down list | ||
#Title the application "SWAT Application - *Your Name*" | #Title the application "SWAT Application - *Your Name*" | ||
To apply for SWAT, you must meet the following requirements: | To apply for SWAT, you must meet the following requirements: | ||
#Ideally a competitive player. | |||
#Ideally a competitive player | #Conquest experience on the Civilian Faction. | ||
Once the SWAT commander has reviewed APD SWAT applications, they will move forward with accepting or rejecting them. | Once the SWAT commander has reviewed APD SWAT applications, they will move forward with accepting or rejecting them. | ||
| Line 27: | Line 27: | ||
='''How S.W.A.T works:'''= | ='''How S.W.A.T works:'''= | ||
*There is a maximum of 10 SWAT members allowed at conquest. | *There is a maximum of 10 SWAT members allowed at [https://wiki.olympus-entertainment.com/wiki/Conquest conquest]. | ||
*SWAT will spawn at the conquest rebel outpost like civilians. | *SWAT will spawn at the conquest rebel outpost like civilians. | ||
*APD will push in waves together as a faction. | *APD will push in waves together as a faction. | ||
*SWAT must attack each first-place gang's points and restore each of their conquest points. | *SWAT must attack each first-place gang's points and restore each of their conquest points. | ||
*If the first place gang does not control any capture points SWAT may choose to attack Capture Points controlled by the 2nd place gang. | **If the first place gang does not control any capture points SWAT may choose to attack Capture Points controlled by the 2nd place gang. | ||
*When the capture point is captured by the SWAT, it will be set to SWAT but they will gain no points. | *When the capture point is captured by the SWAT, it will be set to SWAT but they will gain no points. | ||
**Example: Capture Point Bravo - SFA would change to Capture Point Bravo - SWAT | **Example: Capture Point Bravo - SFA would change to Capture Point Bravo - SWAT | ||
*SWAT will receive $ | *SWAT will receive $150,000 for resetting a capture point and $300,000 for resetting a Hot zone. | ||
*Once SWAT restores a point, they have to leave the capture point | *Once SWAT restores a point, they have to leave the capture point. | ||
*SWAT must then re-group to push another point. | *SWAT must then re-group to push another point. | ||
*SWAT | *SWAT pays $15,000 per death and has no respawn timer in conquest. | ||
*SWAT cannot restrain, impound, or seize civilian vehicles during conquest. | *SWAT cannot restrain, impound, or seize civilian vehicles during conquest. | ||
*SWAT kills provide discounts for SWAT shops. | *SWAT kills provide discounts for SWAT shops. | ||
| Line 46: | Line 45: | ||
**250 to 500 = 15% | **250 to 500 = 15% | ||
**500 to 750 = 20% | **500 to 750 = 20% | ||
='''S.W.A.T Points'''= | |||
SWAT points are a currency that can be used to purchase additional gear and equipment. Here are the ways you can gain/lose SWAT points: | |||
*Killing a player rewards 1 points. | |||
*Capturing a point rewards 5 points to the player that captured the point. | |||
*Dying will lose you 1 point. | |||
SWAT will have access to purchase additional equipment per death but this bought equipment is lost on respawn. Found below is the SWAT point shop and the equipment you can purchase. | |||
Players can no longer wear Granit/Tracksuits with Tier 3 or higher armor. | |||
{| class="wikitable" style="text-align: center | |||
! Equipment | |||
! Points | |||
|- | |||
|Mk200 | |||
|14 | |||
|- | |||
|Mk200 Mags | |||
|2 | |||
|- | |||
|ASP | |||
|30 | |||
|- | |||
|ASP Mags | |||
|1 | |||
|- | |||
|.50 BW Mags | |||
|20 | |||
|- | |||
|7.62 75Rnd Mags | |||
|5 | |||
|- | |||
|6.5mm 100Rnd Mags | |||
|2 | |||
|- | |||
|5.56 150Rnd Mags | |||
|2 | |||
|- | |||
|6.5mm Suppressor | |||
|80 | |||
|- | |||
|5.56 Suppressor | |||
|50 | |||
|- | |||
|CSATs | |||
|5 | |||
|- | |||
|Granits | |||
|10 | |||
|- | |||
|Ifrit | |||
|45 | |||
|- | |||
|Strider | |||
|40 | |||
|- | |||
|Hunter | |||
|20 | |||
|} | |||
='''S.W.A.T Tiering System'''= | ='''S.W.A.T Tiering System'''= | ||
[https://olympus-entertainment.com/topic/39142-swat/ SWAT] is implemented with a tiering system in which different tiers have access to more weapons and equipment. Tiers are gained through getting kills, uncapping the Capture Points, and participating in Conquests. | |||
SWAT is implemented with a tiering system in which different tiers have access to more weapons and equipment. Tiers are gained through getting kills, | |||
The tiering system is as follows: | The tiering system is as follows: | ||
<center> | |||
<div><ul> | |||
<li style="display: inline-table;"> | <li style="display: inline-table;"> | ||
{| style="border: 1px solid black; border-spacing: 0; margin-right: 5px; color: black;" | {| style="border: 1px solid black; border-spacing: 0; margin-right: 5px; color: black;" | ||
|- | |- | ||
|rowspan="9"|[[File: | |rowspan="9"|[[File:Traineef.jpg|center|800x400px|caption]] | ||
|colspan="2" style="font-size:150%; text-align: center; width: 150px; background: #808080;" | '''SWAT I (SWAT Trainee)''' | |colspan="2" style="font-size:150%; text-align: center; width: 150px; background: #808080;" | '''SWAT I (SWAT Trainee)''' | ||
|- | |- | ||
| Line 65: | Line 125: | ||
|style="text-align: left; width: 400px; background: #808080;" | SPAR-16S, MXM | |style="text-align: left; width: 400px; background: #808080;" | SPAR-16S, MXM | ||
|- | |- | ||
|style="text-align: center; width: 125px; background: #808080;" | '''Backpack''' | |style="text-align: center; width: 125px; background: #808080;" | '''Backpack:''' | ||
|style="text-align: left; width: 400px; background: #808080;" | SWAT Backpack | |style="text-align: left; width: 400px; background: #808080;" | SWAT Backpack | ||
|- | |||
|style="text-align: center; width: 125px; background: #808080;" | '''Required Kills:''' | |||
|style="text-align: left; width: 400px; background: #808080;" | Starter Rank for SWAT | |||
|- | |- | ||
|style="text-align: center; color: #808080; width: 125px; background: #808080;" | - | |style="text-align: center; color: #808080; width: 125px; background: #808080;" | - | ||
| Line 84: | Line 147: | ||
{| style="border: 1px solid black; border-spacing: 0; margin-right: 5px; color: black;" | {| style="border: 1px solid black; border-spacing: 0; margin-right: 5px; color: black;" | ||
|- | |- | ||
|rowspan="9"|[[File: | |rowspan="9"|[[File:Privatef.jpg|center|800x400px|caption]] | ||
|colspan="2" style="font-size:150%; text-align: center; width: 150px; background: #808080;" | '''SWAT II (SWAT Private)''' | |colspan="2" style="font-size:150%; text-align: center; width: 150px; background: #808080;" | '''SWAT II (SWAT Private)''' | ||
|- | |- | ||
| Line 93: | Line 156: | ||
|style="text-align: left; width: 400px; background: #808080;" | MXSW | |style="text-align: left; width: 400px; background: #808080;" | MXSW | ||
|- | |- | ||
|style="text-align: center; width: 125px; background: #808080;" | '''Backpack''' | |style="text-align: center; width: 125px; background: #808080;" | '''Backpack:''' | ||
|style="text-align: left; width: 400px; background: #808080;" | SWAT Backpack | |style="text-align: left; width: 400px; background: #808080;" | SWAT Backpack | ||
|- | |- | ||
|style="text-align: center; width: 125px; background: #808080;" | '''Headwear''' | |style="text-align: center; width: 125px; background: #808080;" | '''Headwear:''' | ||
|style="text-align: left; width: 400px; background: #808080;" | Tier 2 Helmet | |style="text-align: left; width: 400px; background: #808080;" | Tier 2 Helmet | ||
|- | |||
|style="text-align: center; width: 125px; background: #808080;" | '''Required Kills:''' | |||
|style="text-align: left; width: 400px; background: #808080;" | 15 | |||
|- | |- | ||
|style="text-align: center; color: #808080; width: 125px; background: #808080;" | - | |style="text-align: center; color: #808080; width: 125px; background: #808080;" | - | ||
| Line 112: | Line 178: | ||
{| style="border: 1px solid black; border-spacing: 0; margin-right: 5px; color: black;" | {| style="border: 1px solid black; border-spacing: 0; margin-right: 5px; color: black;" | ||
|- | |- | ||
|rowspan="9"|[[File: | |rowspan="9"|[[File:PFCf.jpg|center|800x400px|caption]] | ||
|colspan="2" style="font-size:150%; text-align: center; width: 150px; background: #808080;" | '''SWAT III (SWAT Private First Class)''' | |colspan="2" style="font-size:150%; text-align: center; width: 150px; background: #808080;" | '''SWAT III (SWAT Private First Class)''' | ||
|- | |- | ||
| Line 121: | Line 187: | ||
|style="text-align: left; width: 400px; background: #808080;" | Type 115, Promet, AKU-12 | |style="text-align: left; width: 400px; background: #808080;" | Type 115, Promet, AKU-12 | ||
|- | |- | ||
|style="text-align: center; width: 125px; background: #808080;" | '''Backpack''' | |style="text-align: center; width: 125px; background: #808080;" | '''Backpack:''' | ||
|style="text-align: left; width: 400px; background: #808080;" | SWAT Backpack | |style="text-align: left; width: 400px; background: #808080;" | SWAT Backpack | ||
|- | |- | ||
|style="text-align: center; width: 125px; background: #808080;" | '''Headwear''' | |style="text-align: center; width: 125px; background: #808080;" | '''Headwear:''' | ||
|style="text-align: left; width: 400px; background: #808080;" | Tier 2 Helmet | |style="text-align: left; width: 400px; background: #808080;" | Tier 2 Helmet | ||
|- | |||
|style="text-align: center; width: 125px; background: #808080;" | '''Required Kills:''' | |||
|style="text-align: left; width: 400px; background: #808080;" | 30 | |||
|- | |- | ||
|style="text-align: center; color: #808080; width: 125px; background: #808080;" | - | |style="text-align: center; color: #808080; width: 125px; background: #808080;" | - | ||
| Line 140: | Line 209: | ||
{| style="border: 1px solid black; border-spacing: 0; margin-right: 5px; color: black;" | {| style="border: 1px solid black; border-spacing: 0; margin-right: 5px; color: black;" | ||
|- | |- | ||
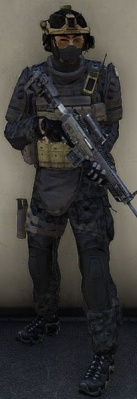
|rowspan="9"|[[File: | |rowspan="9"|[[File:Corpf.jpg|center|800x400px|caption]] | ||
|colspan="2" style="font-size:150%; text-align: center; width: 150px; background: #808080;" | '''SWAT IV (SWAT Corporal)''' | |colspan="2" style="font-size:150%; text-align: center; width: 150px; background: #808080;" | '''SWAT IV (SWAT Corporal)''' | ||
|- | |- | ||
| Line 149: | Line 218: | ||
|style="text-align: left; width: 400px; background: #808080;" | SPAR-17, Mk18 ABR, AK-12 | |style="text-align: left; width: 400px; background: #808080;" | SPAR-17, Mk18 ABR, AK-12 | ||
|- | |- | ||
|style="text-align: center; width: 125px; background: #808080;" | '''Backpack''' | |style="text-align: center; width: 125px; background: #808080;" | '''Backpack:''' | ||
|style="text-align: left; width: 400px; background: #808080;" | SWAT Backpack | |style="text-align: left; width: 400px; background: #808080;" | SWAT Backpack | ||
|- | |- | ||
|style="text-align: center; width: 125px; background: #808080;" | '''Headwear''' | |style="text-align: center; width: 125px; background: #808080;" | '''Headwear:''' | ||
|style="text-align: left; width: 400px; background: #808080;" | Tier 4 Helmet/Pilot Helmet | |style="text-align: left; width: 400px; background: #808080;" | Tier 4 Helmet/Pilot Helmet | ||
|- | |||
|style="text-align: center; width: 125px; background: #808080;" | '''Required Kills:''' | |||
|style="text-align: left; width: 400px; background: #808080;" | 75 | |||
|- | |- | ||
|style="text-align: center; color: #808080; width: 125px; background: #808080;" | - | |style="text-align: center; color: #808080; width: 125px; background: #808080;" | - | ||
| Line 168: | Line 240: | ||
{| style="border: 1px solid black; border-spacing: 0; margin-right: 5px; color: black;" | {| style="border: 1px solid black; border-spacing: 0; margin-right: 5px; color: black;" | ||
|- | |- | ||
|rowspan="9"|[[File: | |rowspan="9"|[[File:Specf.jpg|center|800x400px|caption]] | ||
|colspan="2" style="font-size:150%; text-align: center; width: 150px; background: #808080;" | '''SWAT V (SWAT Specialist)''' | |colspan="2" style="font-size:150%; text-align: center; width: 150px; background: #808080;" | '''SWAT V (SWAT Specialist)''' | ||
|- | |- | ||
| Line 177: | Line 249: | ||
|style="text-align: left; width: 400px; background: #808080;" | Mk-1 EMR | |style="text-align: left; width: 400px; background: #808080;" | Mk-1 EMR | ||
|- | |- | ||
|style="text-align: center; width: 125px; background: #808080;" | '''Backpack''' | |style="text-align: center; width: 125px; background: #808080;" | '''Backpack:''' | ||
|style="text-align: left; width: 400px; background: #808080;" | SWAT Backpack | |style="text-align: left; width: 400px; background: #808080;" | SWAT Backpack | ||
|- | |- | ||
|style="text-align: center; width: 125px; background: #808080;" | '''Headwear''' | |style="text-align: center; width: 125px; background: #808080;" | '''Headwear:''' | ||
|style="text-align: left; width: 400px; background: #808080;" | Tier 4 Helmet/Pilot Helmet | |style="text-align: left; width: 400px; background: #808080;" | Tier 4 Helmet/Pilot Helmet | ||
|- | |||
|style="text-align: center; width: 125px; background: #808080;" | '''Required Kills:''' | |||
|style="text-align: left; width: 400px; background: #808080;" | 150 | |||
|- | |- | ||
|style="text-align: center; color: #808080; width: 125px; background: #808080;" | '''Clothing''' | |style="text-align: center; color: #808080; width: 125px; background: #808080;" | '''Clothing''' | ||
|style="text-align: left; color: #808080; width: 400px; background: #808080;" | | |style="text-align: left; color: #808080; width: 400px; background: #808080;" | Short sleeve Uniform | ||
|- | |- | ||
|style="text-align: center; color: #808080; width: 125px; background: #808080;" | - | |style="text-align: center; color: #808080; width: 125px; background: #808080;" | - | ||
| Line 196: | Line 271: | ||
{| style="border: 1px solid black; border-spacing: 0; margin-right: 5px; color: black;" | {| style="border: 1px solid black; border-spacing: 0; margin-right: 5px; color: black;" | ||
|- | |- | ||
|rowspan="9"|[[File: | |rowspan="9"|[[File:SGTf.jpg|center|800x400px|caption]] | ||
|colspan="2" style="font-size:150%; text-align: center; width: 150px; background: #808080;" | '''Senior SWAT (Sergeant | |colspan="2" style="font-size:150%; text-align: center; width: 150px; background: #808080;" | '''Senior SWAT (Sergeant)''' | ||
|- | |||
|style="text-align: center; width: 125px; background: #808080;" | '''Vest:''' | |||
|style="text-align: left; width: 400px; background: #808080;" | Tier 4 vest | |||
|- | |||
|style="text-align: center; width: 125px; background: #808080;" | '''Weapons:''' | |||
|style="text-align: left; width: 400px; background: #808080;" | RPK-12 | |||
|- | |||
|style="text-align: center; width: 125px; background: #808080;" | '''Backpack:''' | |||
|style="text-align: left; width: 400px; background: #808080;" | SWAT Backpack | |||
|- | |||
|style="text-align: center; width: 125px; background: #808080;" | '''Headwear:''' | |||
|style="text-align: left; width: 400px; background: #808080;" | Tier 4 Helmet/Pilot Helmet | |||
|- | |||
|style="text-align: center; color: #808080; width: 125px; background: #808080;" | '''Clothing''' | |||
|style="text-align: left; color: #808080; width: 400px; background: #808080;" | Short sleeve Uniform | |||
|- | |||
|style="text-align: center; color: #808080; width: 125px; background: #808080;" | - | |||
|style="text-align: left; color: #808080; width: 400px; background: #808080;" | - | |||
|- | |||
|style="text-align: center; color: #808080; width: 125px; background: #808080;" | - | |||
|style="text-align: left; color: #808080; width: 400px; background: #808080;" | - | |||
|} </li> | |||
<li style="display: inline-table;"> | |||
{| style="border: 1px solid black; border-spacing: 0; margin-right: 5px; color: black;" | |||
|- | |||
|rowspan="9"|[[File:LTf.jpg|center|800x400px|caption]] | |||
|colspan="2" style="font-size:150%; text-align: center; width: 150px; background: #808080;" | '''Senior SWAT (Lieutenant & Commander)''' | |||
|- | |||
|style="text-align: center; width: 125px; background: #808080;" | '''Clothing:''' | |||
|style="text-align: left; width: 400px; background: #808080;" | Tracksuit | |||
|- | |- | ||
|style="text-align: center; width: 125px; background: #808080;" | '''Vest:''' | |style="text-align: center; width: 125px; background: #808080;" | '''Vest:''' | ||
| Line 205: | Line 311: | ||
|style="text-align: left; width: 400px; background: #808080;" | RPK-12 | |style="text-align: left; width: 400px; background: #808080;" | RPK-12 | ||
|- | |- | ||
|style="text-align: center; width: 125px; background: #808080;" | '''Backpack''' | |style="text-align: center; width: 125px; background: #808080;" | '''Backpack:''' | ||
|style="text-align: left; width: 400px; background: #808080;" | SWAT Backpack | |style="text-align: left; width: 400px; background: #808080;" | SWAT Backpack | ||
|- | |- | ||
|style="text-align: center; width: 125px; background: #808080;" | '''Headwear''' | |style="text-align: center; width: 125px; background: #808080;" | '''Headwear:''' | ||
|style="text-align: left; width: 400px; background: #808080;" | Tier 4 Helmet/Pilot Helmet | |style="text-align: left; width: 400px; background: #808080;" | Tier 4 Helmet/Pilot Helmet | ||
|- | |- | ||
|style="text-align: center; color: #808080; width: 125px; background: #808080;" | '''Clothing''' | |style="text-align: center; color: #808080; width: 125px; background: #808080;" | '''Clothing''' | ||
|style="text-align: left; color: #808080; width: 400px; background: #808080;" | | |style="text-align: left; color: #808080; width: 400px; background: #808080;" | Short sleeve Uniform | ||
|- | |- | ||
|style="text-align: center; color: #808080; width: 125px; background: #808080;" | - | |style="text-align: center; color: #808080; width: 125px; background: #808080;" | - | ||
| Line 220: | Line 326: | ||
|style="text-align: left; color: #808080; width: 400px; background: #808080;" | - | |style="text-align: left; color: #808080; width: 400px; background: #808080;" | - | ||
|} </li> | |} </li> | ||
</ul></div> | |||
</center> | |||
='''S.W.A.T Equipment'''= | ='''S.W.A.T Equipment'''= | ||
*SWAT will have access to different equipment and vehicles than regular APD, and this equipment can only be used whilst playing as a SWAT member during conquest; this applies vice versa to APD equipment. You also cannot use SWAT equipment or vehicles during any means necessary. | *SWAT will have access to different equipment and vehicles than regular APD, and this equipment can only be used whilst playing as a SWAT member during conquest; this applies vice versa to APD equipment. You also cannot use SWAT equipment or vehicles during any means necessary. | ||
*Additionally, SWAT are not to use items that only the APD Faction has access to. Specifically spike strips, bait appliances, tear gas, and | *Additionally, SWAT are not to use items that only the APD Faction has access to. Specifically spike strips, bait appliances, tear gas, and flashbangs. | ||
*SWAT will exclusively use lethals while participating in Conquest; however, these lethals do not remove a player's bounty, nor do they give a reduced | *SWAT will exclusively use lethals while participating in Conquest; however, these lethals do not remove a player's bounty, nor do they give a reduced 10-minute dopamine timer. | ||
*When SWAT is conducting Conquest Raids, they must use their Chain of Command name as well as the | *When SWAT is conducting Conquest Raids, they must use their Chain of Command name as well as the “SWAT |” tag (Example: SWAT | Bob) | ||
Latest revision as of 00:03, 27 January 2024
Mako
What is S.W.A.T?
The Altis Police Department SWAT is a dedicated division of the force tasked with deploying to and operating within active Conquest events. While present at these conquest events, the SWAT Team’s objective is to find and neutralize High-Value Targets (HVTs) from different top-ranking gangs participating in the event. If you are looking for the SWAT rules outlined in the APD Handbook click Here
Joining the S.W.A.T Team
Follow the list below to submit an application for SWAT.
- Navigate to the Olympus Forums.
- Navigate to the "Support" area of the forums.
- Select "New Request"
- Select "SWAT Application" from the department drop-down list
- Title the application "SWAT Application - *Your Name*"
To apply for SWAT, you must meet the following requirements:
- Ideally a competitive player.
- Conquest experience on the Civilian Faction.
Once the SWAT commander has reviewed APD SWAT applications, they will move forward with accepting or rejecting them.
How S.W.A.T works:
- There is a maximum of 10 SWAT members allowed at conquest.
- SWAT will spawn at the conquest rebel outpost like civilians.
- APD will push in waves together as a faction.
- SWAT must attack each first-place gang's points and restore each of their conquest points.
- If the first place gang does not control any capture points SWAT may choose to attack Capture Points controlled by the 2nd place gang.
- When the capture point is captured by the SWAT, it will be set to SWAT but they will gain no points.
- Example: Capture Point Bravo - SFA would change to Capture Point Bravo - SWAT
- SWAT will receive $150,000 for resetting a capture point and $300,000 for resetting a Hot zone.
- Once SWAT restores a point, they have to leave the capture point.
- SWAT must then re-group to push another point.
- SWAT pays $15,000 per death and has no respawn timer in conquest.
- SWAT cannot restrain, impound, or seize civilian vehicles during conquest.
- SWAT kills provide discounts for SWAT shops.
- 50 to 100 = 5%
- 100 to 250 = 10%
- 250 to 500 = 15%
- 500 to 750 = 20%
S.W.A.T Points
SWAT points are a currency that can be used to purchase additional gear and equipment. Here are the ways you can gain/lose SWAT points:
- Killing a player rewards 1 points.
- Capturing a point rewards 5 points to the player that captured the point.
- Dying will lose you 1 point.
SWAT will have access to purchase additional equipment per death but this bought equipment is lost on respawn. Found below is the SWAT point shop and the equipment you can purchase.
Players can no longer wear Granit/Tracksuits with Tier 3 or higher armor.
| Equipment | Points |
|---|---|
| Mk200 | 14 |
| Mk200 Mags | 2 |
| ASP | 30 |
| ASP Mags | 1 |
| .50 BW Mags | 20 |
| 7.62 75Rnd Mags | 5 |
| 6.5mm 100Rnd Mags | 2 |
| 5.56 150Rnd Mags | 2 |
| 6.5mm Suppressor | 80 |
| 5.56 Suppressor | 50 |
| CSATs | 5 |
| Granits | 10 |
| Ifrit | 45 |
| Strider | 40 |
| Hunter | 20 |
S.W.A.T Tiering System
SWAT is implemented with a tiering system in which different tiers have access to more weapons and equipment. Tiers are gained through getting kills, uncapping the Capture Points, and participating in Conquests.
The tiering system is as follows:
-
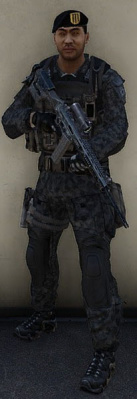
SWAT I (SWAT Trainee) Vest: Carrier Light Weapons: SPAR-16S, MXM Backpack: SWAT Backpack Required Kills: Starter Rank for SWAT - - - - - - - - -
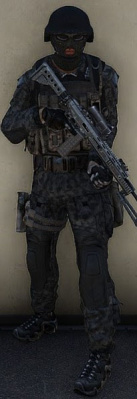
SWAT II (SWAT Private) Vest: Carrier Light Weapons: MXSW Backpack: SWAT Backpack Headwear: Tier 2 Helmet Required Kills: 15 - - - - - - -
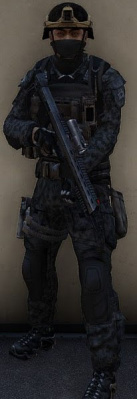
SWAT III (SWAT Private First Class) Vest: Carrier Light Weapons: Type 115, Promet, AKU-12 Backpack: SWAT Backpack Headwear: Tier 2 Helmet Required Kills: 30 - - - - - - -

SWAT IV (SWAT Corporal) Vest: GL Carrier Rig Weapons: SPAR-17, Mk18 ABR, AK-12 Backpack: SWAT Backpack Headwear: Tier 4 Helmet/Pilot Helmet Required Kills: 75 - - - - - - -
SWAT V (SWAT Specialist) Vest: GL Carrier Rig Weapons: Mk-1 EMR Backpack: SWAT Backpack Headwear: Tier 4 Helmet/Pilot Helmet Required Kills: 150 Clothing Short sleeve Uniform - - - - -
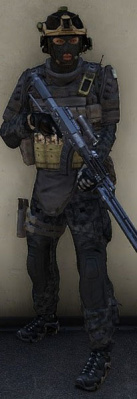
Senior SWAT (Sergeant) Vest: Tier 4 vest Weapons: RPK-12 Backpack: SWAT Backpack Headwear: Tier 4 Helmet/Pilot Helmet Clothing Short sleeve Uniform - - - - -
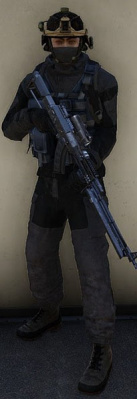
Senior SWAT (Lieutenant & Commander) Clothing: Tracksuit Vest: GL Carrier Rig Weapons: RPK-12 Backpack: SWAT Backpack Headwear: Tier 4 Helmet/Pilot Helmet Clothing Short sleeve Uniform - - - -


S.W.A.T Equipment
- SWAT will have access to different equipment and vehicles than regular APD, and this equipment can only be used whilst playing as a SWAT member during conquest; this applies vice versa to APD equipment. You also cannot use SWAT equipment or vehicles during any means necessary.
- Additionally, SWAT are not to use items that only the APD Faction has access to. Specifically spike strips, bait appliances, tear gas, and flashbangs.
- SWAT will exclusively use lethals while participating in Conquest; however, these lethals do not remove a player's bounty, nor do they give a reduced 10-minute dopamine timer.
- When SWAT is conducting Conquest Raids, they must use their Chain of Command name as well as the “SWAT |” tag (Example: SWAT | Bob)