|
|
| (11 intermediate revisions by the same user not shown) |
| Line 4: |
Line 4: |
|
| |
|
|
| |
|
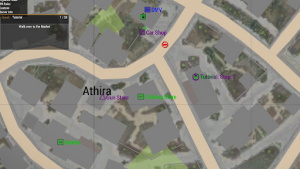
| [[File:Questimage1.jpg|300px|thumb|right|The marked Tutorial quest area as indicated on the map.]]
| |
| [[File:Questimage2.jpg|300px|thumb|right|This image shows you the GUI that pops up when you start a quest displaying the steps as well as the next quest step indicator on the map to help guide you to the next step.]] | | [[File:Questimage2.jpg|300px|thumb|right|This image shows you the GUI that pops up when you start a quest displaying the steps as well as the next quest step indicator on the map to help guide you to the next step.]] |
| [[File:Questimage4.jpg|300px|thumb|right|This image shows you the quest menu within your “Y” menu including all quests, as well as a description of the quest currently highlighted.]] | | [[File:Quest Menu.jpg|300px|thumb|right|This image shows you the quest menu within your “Y” menu including all quests, as well as a description of the quest currently highlighted.]] |
|
| |
|
|
| |
|
| =='''Quests'''== | | =='''Quests'''== |
|
| |
|
| Quest are missions players can do to achieve in-game rewards. Quests can range in difficulty from five minutes all the way up to an hour or two. Some quests may be more of a “how-to” for new players while some might be mini easter egg hunts. There are quest specific rules that are in place to protect those doing quests, they can be found [[Altis Life Rules#Chapter_22:_Interacting_with_Whitelist_Training_/_Player_Tutorial | here]]. | | Quest are missions players can do to achieve in-game rewards. Quests can range in difficulty from five minutes all the way up to an hour or two. Some quests may be more of a “how-to” for new players while some might be mini easter egg hunts. There are quest specific rules that are in place to protect those doing the tutorial quest, they can be found [[Altis Life Rules#Chapter_22:_Interacting_with_Whitelist_Training_/_Player_Tutorial | here]]. |
|
| |
|
| =='''How to start a quest'''== | | =='''How to start a quest'''== |
| Line 18: |
Line 17: |
| =='''Quest List'''== | | =='''Quest List'''== |
|
| |
|
| ==='''Tutorial'''=== | | <gallery mode=packed-overlay heights=200px> |
| | File:Silverpro2023.jpg|Tutorial Quest|link=[[Tutorial Quest]] |
| | File:Rocktrader.jpg|Cement|link=[[Cement Run Quest]] |
| | File:Sandmine2023.jpg|Glass|link=[[Glass Run Quest]] |
| | File:Crystal meth main.jpeg|Meth|link=[[Meth Run Quest]] |
| | File:Nov22moonshinepro1.jpeg|Moonshine|link=[[Moonshine Run Quest]] |
| | </gallery> |
|
| |
|
| New to the island? This is the perfect quest to start with. You will start off in Athira and learn the basic steps to make money.
| |
|
| |
|
| |
| #Walk to the clothing store and fetch a Carryall backpack.
| |
| #Walk over to the Market.
| |
| #Buy a pickaxe, some food, some water, and some Redgull from the market Note: The Redgull will give you no stamina for 3 minutes when used and can be bound to custom action 11.
| |
| #Walk over to the DMV.
| |
| #Buy a [[License Costs]].
| |
| #Walk over to the [[Civilian Vehicles]]
| |
| #Take out an offroad from your garage, Press (U) to unlock it and get in the driver seat
| |
| #Open your [[Map of Olympus]] with (M) and find the [[Silver | Silver Mine]]. Then drive over to the silver mine
| |
| #While at the silver mine, press the Windows Key to gather unprocessed silver nuggets. Note: You gather faster if you run around while gathering. Press Tab to cancel gathering.
| |
| #Continue gathering unprocessed silver till you have at least 40 silver Note: You gather faster if you run around while gathering. Press Tab to cancel gathering
| |
| #Press (T) while looking at your offroad to open it's inventory
| |
| #Fill the offroad's trunk with your unprocessed silver (40 Silver)
| |
| #Continue filling the trunk until it is full (40 Silver) Note: You gather faster if you run around while gathering. Press Tab to cancel gathering
| |
| #Finish gathering by filling up your inventory Note: You gather faster if you run around while gathering. Press Tab to cancel gathering
| |
| #Open your map with (M) and find the Silver Processor. Then drive over to the silver processor
| |
| #Use your scroll wheel on the processor to start processing your inventory and turn the silver into ingots
| |
| #Continue processing your silver till your inventory and trunk no longer has unprocessed silver
| |
| #Open your map with (M) and find the Silver Trader. Then drive over to the silver trader
| |
| #Sell all the silver ingots in your inventory and trunk to the silver trader
| |
| #Go to the ATM by the Vehicle Car Shop. Note: Marked Gas Stations always have at least one ATM
| |
| #Use the ATM by pressing Windows Key on it and depositing all your on-hand cash
| |
| #Open your map with (M) and find the nearest [[Firearms, Weapons, and Accessories]]. Drive over to the gun store. Note: Now that you have some money you could go to the nearby gas station to the south and upgrade your offroad
| |
| #Use the gun store and buy yourself a Firearms License and a Protector
| |
| #Walk outside and speak with the Worker Protection License NPC
| |
| #Speak with the [[Vigilante]] NPC
| |
| #Speak with the [[Rebel]] NPC
| |
| #Speak with the [[Altis Police Department]] (APD) NPC
| |
| #Speak with the [[Rescue & Recovery]] (RNR) NPC
| |
|
| |
|
| |
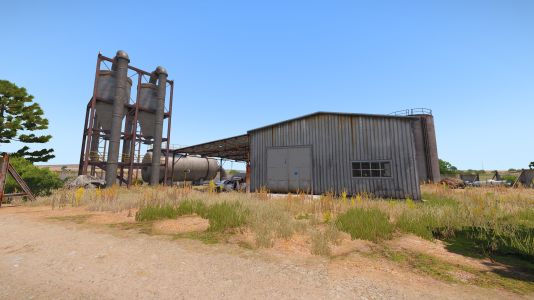
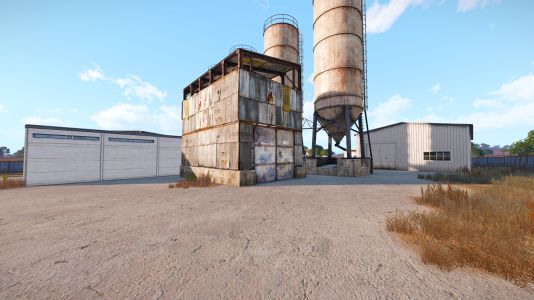
| ==='''Cement Run'''===
| |
|
| |
| After completing the Tutorial Quest you can travel to Pyrgos and start the Cement Run quest line
| |
|
| |
|
| |
| #Walk to the clothing store and fetch a Carryall backpack
| |
| #Walk over to the Market
| |
| #Buy a pickaxe with some food, water, and redgull from the market
| |
| #Walk over to the DMV
| |
| #Buy a Cement Processing License and Truck License
| |
| #Walk over to the Car Shop
| |
| #Retrieve any vehicle from your garage, press (U) to unlock it and get in the driver seat
| |
| #Open your map with (M) and find the Truck Shop. Then drive over to the Truck Shop
| |
| #Purchase/retrieve a Truck boxer, press (U) to unlock it and get in the driver seat
| |
| #Open your map with (M) and find the Rock Quarry. Then drive over to the Rock Quarry
| |
| #While at the Rock Quarry, press the Windows Key to gather rocks.
| |
| #Continue gathering rocks until you have at least 30 rocks
| |
| #Press T while looking at your Truck Boxer to open it's inventory
| |
| #Fill the Truck Boxer's inventory with your rocks (30 rocks)
| |
| #Continue filling the truck until it is full (100 rocks)
| |
| #Finish gathering by filling up your inventory
| |
| #Open your map with (M) and find the Rock Processor. Then driver over to the Rock Processor
| |
| #Use your scroll wheel on the processor to start processing your inventory and turn the rocks into cement bags
| |
| #Continue processing your rocks until your inventory and trunk no longer has rocks
| |
| #Open your map with (M) and find the Cement Trader. Then drive over to the Cement Trader
| |
| #Sell all the Cement Bags in your inventory and truck to the Cement Trader
| |
| #Go to the ATM in DP 13
| |
| #Use the ATM by pressing Windows Key on it and depositing all your on-hand cash
| |
|
| |
|
| |
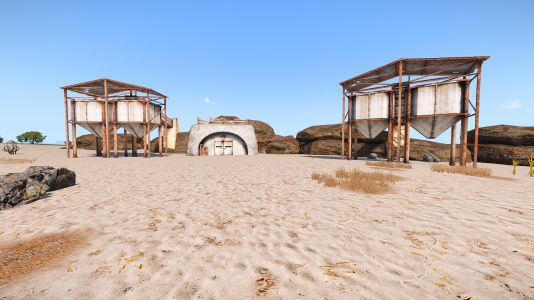
| ==='''Glass Run'''===
| |
| The final quest that is offered is the Glass Run. This quest will start off in Neochori
| |
|
| |
|
| |
| #Walk over to the Market
| |
| #Buy a pickaxe with some food, water, and Redgull from the market
| |
| #Walk over to the DMV
| |
| #Buy a Sand Processing License
| |
| #Walk over to the Car Shop
| |
| #Retrieve any vehicle from your garage, press (U) to unlock it and get in the driver seat
| |
| #Open your map with (M) and find the Truck Shop. Then driver over to the Truck Shop
| |
| #Purchase/retrieve a Truck Boxer, press (U) to unlock it and get in the driver seat
| |
| #Open your map with (M) and find the Sand Mine. Then drive over to the Sand Mine
| |
| #While at the Sand Mine, press the Windows Key to gather sand
| |
| #Continue gathering sand until you have at least 30 sand
| |
| #Press (T) while looking at your Truck Boxer to open it's inventory
| |
| #Fill the Truck Boxer with your sand (30 sand)
| |
| #Continue filling the trunk until it is full (150 sand)
| |
| #Finish gathering by filling up your inventory
| |
| #Open your map with (M) and find the Sand Processor. Then drive over to the Sand Processor
| |
| #Use your scroll wheel on the processor to start processing your inventory and turn the sand into glass
| |
| #Continue processing your sand until your inventory and trunk no longer have sand
| |
| #Open your map with (M) and find the Glass Trader. Then driver over to the Glass Trader
| |
| #Sell all the Glass in your inventory and trunk to the Glass Trader
| |
| #Go to the ATM to the left of the Glass Trader located at the Gas Station
| |
| #Use the ATM by pressing Windows Key on it and depositing all your on-hand cash
| |
|
| |
|
| ---- | | ---- |
| ''The Wiki Team is currently working on several quests to come in future updates. If you have any suggestions please feel free to reach out to one of us on the [https://olympus-entertainment.com/staff/ forums].'' | | ''The Developer Team is currently working on several quests to come in future updates. If you have any suggestions please feel free to reach out to one of us on the [https://olympus-entertainment.com/staff/ forums].'' |
